Classic Banana Pudding
Highlighted under: Homemade Baking | Sweet Desserts
I have always had a soft spot for classic banana pudding. There's something incredibly comforting about the creamy custard, layers of fresh bananas, and fluffy whipped cream. Every time I prepare it, I’m transported back to family gatherings where this dessert was the star of the table. This recipe is simple yet so satisfying, allowing me to showcase the natural sweetness of the bananas while the vanilla flavor adds depth. If you’re looking for an indulgent dessert that feels like a warm hug, look no further than this banana pudding.
Each time I craft my banana pudding, I like to experiment slightly with the textures. I believe the key to a great banana pudding is allowing the layers to meld together for a while before serving; this enhances the flavor and softens the cookies just right. Last weekend, I made it for a picnic, and watching everyone enjoy the blend of creamy custard and fresh bananas was a delightful reminder of why this dessert is so beloved.
One tip I’ve learned is to opt for ripe but not overly brown bananas. They bring the perfect amount of sweetness without being too mushy. I also recommend making the pudding one day in advance if you have the time. This extra resting period allows the flavors to develop beautifully, making every bite a heavenly experience!
Why You Will Love This Recipe
- Creamy custard that balances sweetness and richness
- Fresh bananas add a lovely fruity dimension
- A quick and satisfying dessert that pleases all ages
The Importance of Flavor Balance
Each ingredient in this classic banana pudding plays a crucial role in achieving the right balance of flavors. The combination of granulated sugar and vanilla extract enhances the natural sweetness of the bananas, allowing them to shine without being overly sugary. Be sure to use ripe bananas, as they have a higher sugar content and a softer texture that blends beautifully with the pudding. Consider selecting large, firm bananas for even slicing; this ensures they maintain their shape and provide texture in each bite.
Cornstarch serves as the thickening agent in the pudding, giving it a luxurious, creamy texture. When mixing cornstarch with liquid, it’s important to whisk continuously to avoid lumps. If you notice any clumps while cooking, use an immersion blender to smooth the mixture before adding the eggs. It's essential to not overcook the pudding, as this can lead to an overly thick consistency; you want it to be pourable yet able to hold its shape when layered.
Layering Techniques for Success
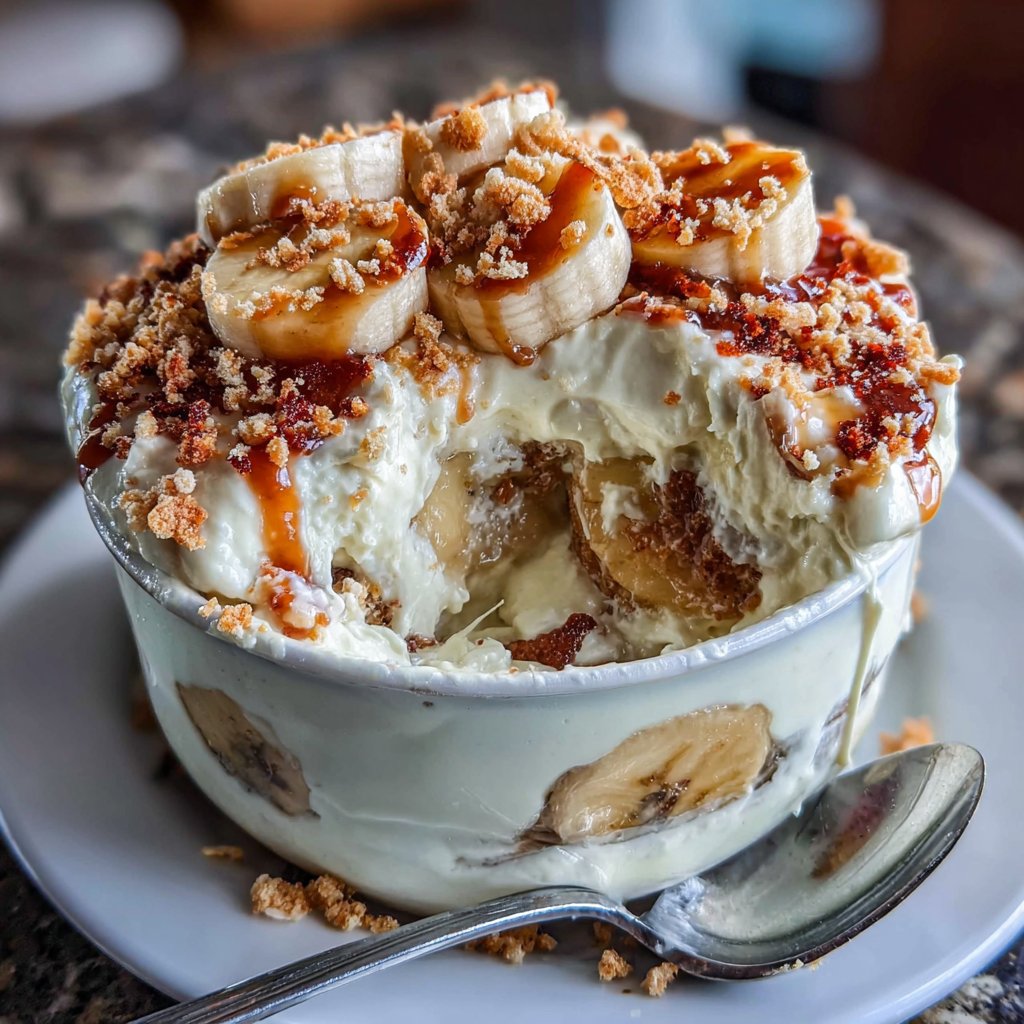
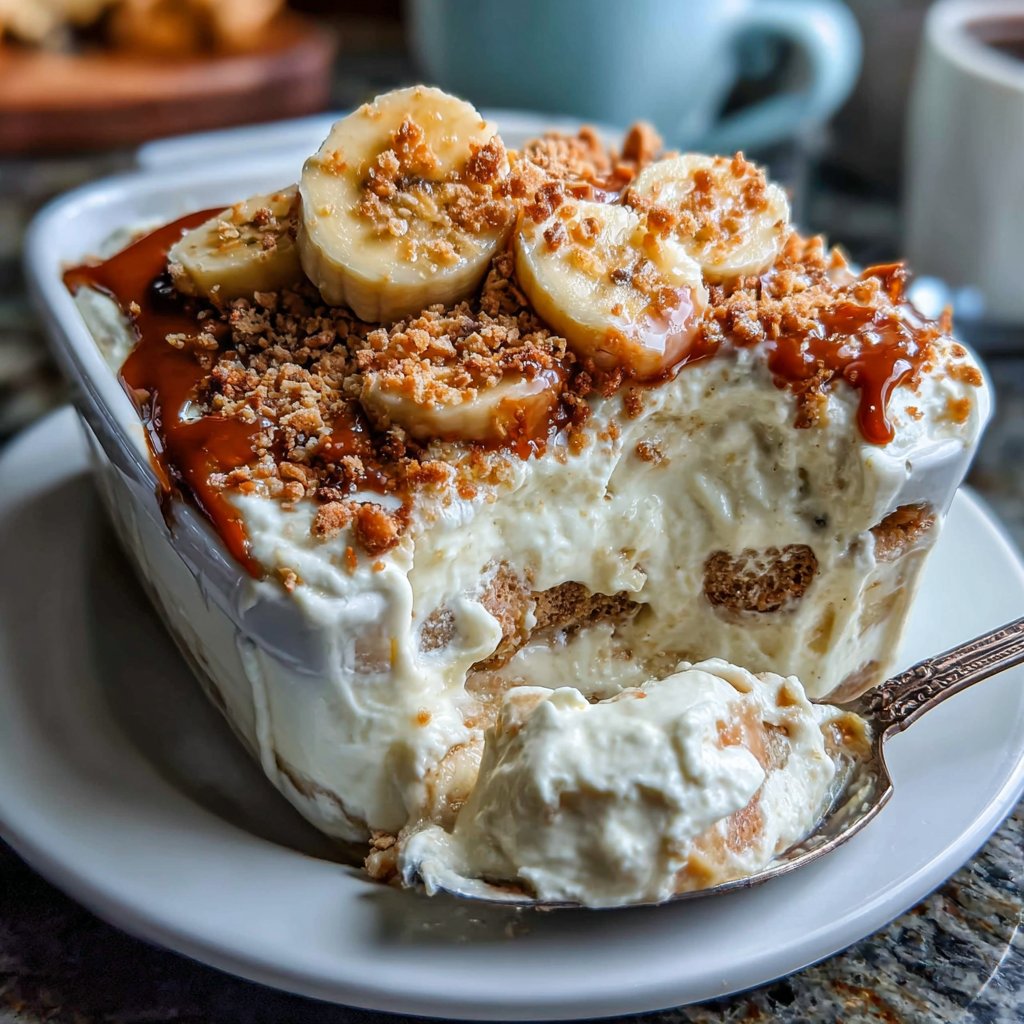
Building the layers in your banana pudding is where both presentation and flavor come into play. Start by placing a layer of vanilla wafers at the bottom of your dish, ensuring they don’t overlap too much. This base layer should absorb some of the pudding and banana juices, softening without becoming mushy. There's a beautiful texture dynamic when the creamy pudding meets the crunchy wafers, so aim for an even distribution of ingredients during layering.
When it comes to layering, a good rule of thumb is to use about a cup of pudding per layer—to help everything set properly. Make sure to slice the bananas just before layering to prevent browning; if you need to slice them in advance, squeeze a little fresh lemon juice over them. For an extra touch, you can sprinkle crushed vanilla wafers or a dusting of cinnamon on top of the whipped cream for added flavor and visual appeal.
Ingredients
For the Pudding
- 2 cups milk
- 1/2 cup granulated sugar
- 1/4 cup cornstarch
- 1/4 teaspoon salt
- 2 large eggs, beaten
- 1 teaspoon vanilla extract
For Assembly
- 4 ripe bananas, sliced
- 1 box vanilla wafers
- 1 cup heavy cream, whipped
Make sure to slice the bananas just before assembly to prevent browning.
Instructions
Prepare the Pudding
In a saucepan, combine the milk, sugar, cornstarch, and salt. Cook over medium heat, stirring constantly until the mixture thickens. Once thickened, temper the beaten eggs with a little of the hot mixture, then return to the pot. Stir in vanilla and remove from heat.
Layer the Pudding
In a glass dish, layer vanilla wafers, banana slices, and then the pudding. Repeat layers until all ingredients are used, finishing with pudding on top.
Top with Whipped Cream
Spread the whipped cream over the final layer of pudding. Cover and refrigerate for at least 2 hours before serving to allow the flavors to meld.
For a fun twist, try adding chocolate shavings on top before serving.
Pro Tips
- If you're in a rush, you can use instant pudding mix, but homemade offers a vastly better flavor and texture.
Storage and Make-Ahead Tips
One of the best things about this classic banana pudding is that it can be made ahead of time. Once assembled and topped with whipped cream, it can be refrigerated for up to 2 days. This allows the flavors to develop further, making it even more delicious after sitting. Just be sure to cover it tightly with plastic wrap to prevent it from absorbing any odors from the fridge.
If you plan to make this dessert for a gathering, consider preparing the pudding one day in advance. Store it in the refrigerator in an airtight container and layer it with the bananas and wafers just before serving. This method keeps everything fresh while allowing the pudding to set perfectly. Avoid freezing this pudding recipe, as the texture may suffer after thawing—the cream and bananas do not freeze well.
Variations and Customizations
Feel free to customize your banana pudding to suit your taste. A touch of peanut butter added to the whipped cream can create a delightful twist, offering a rich and nutty flavor that pairs beautifully with bananas. For those who enjoy chocolate, consider drizzling melted chocolate or sprinkling mini chocolate chips between the layers for an indulgent treat.
You can also explore alternative toppings. Instead of traditional whipped cream, try a layer of meringue topped with toasted coconut for a tropical flair. Additionally, if you want a dairy-free version, substitute the milk with almond or oat milk and use a plant-based whipped topping. These variations ensure everyone can enjoy this classic dessert, no matter their dietary preferences.
Questions About Recipes
→ Can I make this banana pudding in advance?
Yes, it’s best if made a few hours ahead or even the day before to enhance the flavors.
→ What can I substitute for vanilla wafers?
Graham crackers or shortbread cookies can be good alternatives.
→ How should I store leftover banana pudding?
Store it in an airtight container in the refrigerator for up to 2 days. Note that the bananas will brown over time.
→ Can I use a sugar substitute in this recipe?
Yes, you can use a sugar substitute, but it may affect the consistency and sweetness.
Classic Banana Pudding
Created by: The Fionasrecipes Team
Recipe Type: Homemade Baking | Sweet Desserts
Skill Level: Easy
Final Quantity: 8 servings
What You'll Need
For the Pudding
- 2 cups milk
- 1/2 cup granulated sugar
- 1/4 cup cornstarch
- 1/4 teaspoon salt
- 2 large eggs, beaten
- 1 teaspoon vanilla extract
For Assembly
- 4 ripe bananas, sliced
- 1 box vanilla wafers
- 1 cup heavy cream, whipped
How-To Steps
In a saucepan, combine the milk, sugar, cornstarch, and salt. Cook over medium heat, stirring constantly until the mixture thickens. Once thickened, temper the beaten eggs with a little of the hot mixture, then return to the pot. Stir in vanilla and remove from heat.
In a glass dish, layer vanilla wafers, banana slices, and then the pudding. Repeat layers until all ingredients are used, finishing with pudding on top.
Spread the whipped cream over the final layer of pudding. Cover and refrigerate for at least 2 hours before serving to allow the flavors to meld.
Extra Tips
- If you're in a rush, you can use instant pudding mix, but homemade offers a vastly better flavor and texture.
Nutritional Breakdown (Per Serving)
- Calories: 320 kcal
- Total Fat: 22g
- Saturated Fat: 10g
- Cholesterol: 90mg
- Sodium: 150mg
- Total Carbohydrates: 35g
- Dietary Fiber: 2g
- Sugars: 20g
- Protein: 4g